How to Fix a Door That Won’t Close Properly (Causes and Easy Fixes)

A door that sticks, drags, or won’t latch properly is one of those daily frustrations that most people just put up with rather than fixing. The truth is that most door problems have simple causes and simple solutions. The fix depends on why the door is misbehaving, and diagnosing the cause correctly is half the job.

Doors go wrong for a few main reasons: humidity causing the wood to swell, hinges that have come loose, the house settling and shifting the door frame slightly, or a strike plate that’s no longer aligned with the latch. Here’s how to identify and fix each one.
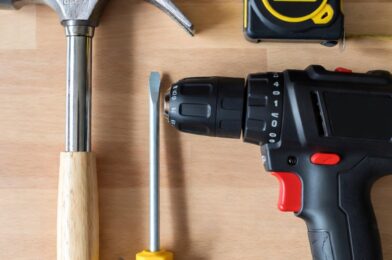
What You’ll Need

  • Screwdrivers (Phillips and flathead)
  • Longer screws (3-inch wood screws for hinge repair)
  • Sandpaper (medium and fine grit)
  • Wood plane or power sander (for serious sticking)
  • Strike plate chisel kit (optional)
  • Pencil
  • Candle or chalk

Step by Step Instructions :

Step 1: Find exactly where it’s sticking

Rub a candle or a piece of chalk around the edges of the door. Close the door and open it again the chalk or wax will transfer to wherever the door is touching the frame, showing you precisely where the problem is.

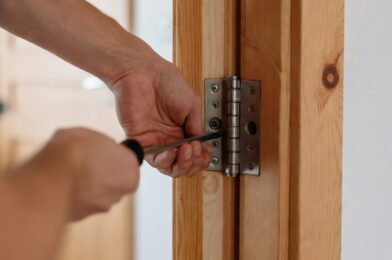
Step 2: Tighten loose hinge screws first

This is the most overlooked fix, and it solves a lot of door problems. Open the door and check every hinge screw. If any turn without tightening, the screw hole is stripped. Remove the screw, pack the hole with wooden toothpicks dipped in wood glue, let it dry for an hour, then reinsert the original screw or a longer one. This often completely solves the problem.

Step 3: Adjust or shim the hinges

If the door latch side is dragging on the floor or the top corner is hitting the frame, a hinge may be set too deep or not deep enough. Loosen the hinge screws, slide a piece of cardboard behind the hinge as a shim, and retighten. This moves the door very slightly and can correct small alignment issues.

Step 4: Sand or plane the sticking edge

If the door swells in summer and humidity is the cause, you need to remove a small amount of material from the sticking edge. For minor sticking, medium grit sandpaper works well. For significant swelling, use a hand plane or belt sander. Paint the raw wood edge immediately after unprotected wood will absorb moisture and swell again quickly.

Step 5: Adjust the strike plate

If the door closes but the latch doesn’t catch, the strike plate (the metal plate on the door frame) is misaligned. You can see where the latch is hitting by rubbing lipstick or chalk on the latch, then closing the door to mark the strike plate. File the strike plate opening slightly in the direction needed, or remove it completely and reinstall it in the correct position.

Pro Tips

During periods of high humidity (summer), wood doors naturally swell. Before sanding or planing, wait to see if the problem resolves itself as the weather cools and the wood dries out. Many seasonal sticking problems disappear on their own in fall.

If the door frame itself is visibly out of square, the house may have settled significantly. This is worth having a contractor assess, as it can indicate a structural issue.

Final Thoughts

Most door problems are solved in under an hour with a screwdriver and some sandpaper. The key is diagnosing the cause first rather than immediately sanding or planing removing wood is irreversible, so rule out the simpler fixes like loose hinges before you start modifying the door itself.

10 Essential Tools Every Homeowner Should Have (And What to Use Them For)

You don’t need a workshop full of equipment to handle most home repairs. A well chosen set of 10 basic tools will handle the overwhelming majority of common household jobs from hanging pictures to fixing leaky faucets to assembling furniture to patching walls.

I’ve been doing home repairs for over a decade, and these are the tools I reach for constantly. Everything on this list is available at any hardware store, and the entire collection costs around $100-$150 if bought new. Many of these can be found used for much less.

The Full List :

1. Hammer

A 16-oz claw hammer handles everything from hanging pictures to light demolition. The claw end removes nails cleanly. Look for one with a comfortable rubber grip you’ll feel the difference during extended use. This is the single most fundamental tool in any home.

2. Screwdriver set

Buy a set that includes multiple sizes of both Phillips (cross-head) and flathead (straight) screwdrivers. You’ll use these weekly. A magnetic tip is worth a few extra dollars it holds screws in place while you drive them, which is invaluable in tight spaces.

3. Tape measure (25 feet)

A 25 foot tape measure handles everything from measuring rooms for furniture to cutting lumber. The lock button keeps the tape extended while you work alone. Learn to read both the inch fractions and the 16-inch stud spacing marks they’ll save you time on many projects.

4. Adjustable wrench

One good adjustable wrench replaces a whole set of fixed-size wrenches for most home repair purposes. Use it for plumbing repairs, tightening bolts, and countless other tasks. An 8-inch or 10-inch adjustable wrench covers the range of sizes you’ll encounter most often.

5. Utility knife

A utility knife with replaceable blades cuts everything from drywall to carpet to cardboard to packaging. Keep a pack of spare blades a sharp blade makes cleaner cuts and is actually safer than a dull one that requires extra force and can slip.

6. Level

A 24-inch level ensures your shelves, pictures, and installations are perfectly horizontal or vertical. Nothing looks worse than a shelf that’s clearly tilted. Even a small 9-inch torpedo level works for most household tasks if counter space is limited.

7. Power drill and bits

A cordless drill is arguably the most versatile tool you can own. It drives screws, drills holes, and with the right attachment can mix paint, drive bolts, and more. Buy one with at least two batteries so one is always charged. A basic set of drill bits and screwdriver bits is usually included.

8. Pliers

A set that includes needle-nose pliers (for electrical work and tight spaces), standard slip-joint pliers (for general gripping), and locking pliers (Vise-Grips) covers essentially every situation. These come up constantly in plumbing, electrical, and assembly work.

9. Stud finder

When hanging anything heavy on a wall shelves, TVs, cabinets you need to anchor into the wall studs, not just the drywall. A basic electronic stud finder costs about $15 and prevents the expensive mistake of having a heavy shelf pull out of the wall and damage the drywall.

10. Caulk gun and caulk

A basic caulk gun and a few tubes of caulk (one silicone for bathrooms and kitchens, one paintable for trim and windows) handle sealing, weatherproofing, and finishing work around the entire house. This combination is used more frequently than most people expect.

Pro Tips

Buy quality where it matters most: screwdrivers, drill, and tape measure are worth spending a bit more on since you’ll use them constantly. For specialty tools you’ll use rarely, a budget option is fine.

Store your tools in one dedicated place a toolbox, a drawer, or a wall mounted organizer. Half the frustration of home repair projects comes from not being able to find the right tool when you need it.

Final Thoughts

With these 10 tools, you can handle approximately 80% of common household repairs and projects without calling a professional. Start with the basics and add specialty tools as specific projects require them. A good set of hand tools is one of the best long term investments a homeowner can make.