Every fall, most homeowners do a few obvious things like putting away the garden hoses and maybe changing the furnace filter. But a truly winterized home is protected at every vulnerability drafty windows, uninsulated pipes, an overtaxed heating system, and energy leaks that quietly inflate your utility bills all winter.
I started taking winterization seriously after a particularly brutal cold snap that froze a pipe in my garage wall and caused $800 in water damage. The following year I spent a Saturday going through this checklist and had no problems at all. It takes about half a day and saves noticeably on heating bills.
What You’ll Need
- Weatherstripping (foam or V-strip)
- Caulk gun and silicone caulk
- Foam pipe insulation (for exposed pipes)
- Furnace filter (correct size for your system)
- Door draft stopper
- Window insulation film kit (optional)
- Flashlight for inspection
Step by Step Instructions :
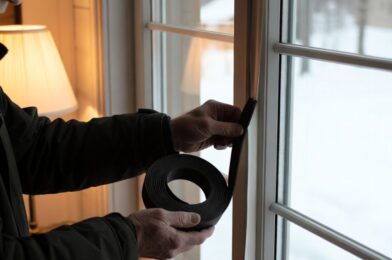
Step 1: Seal gaps around windows and doors
On a cold day, hold your hand near window and door frames and feel for drafts. Use a stick of incense or a candle the smoke will show you exactly where air is entering. Seal gaps with weatherstripping on door frames and caulk around window frames. This single step can reduce heating costs by 10-15%.
Step 2: Insulate exposed pipes
Any pipes in unheated spaces like garages, crawl spaces, or against exterior walls are vulnerable to freezing. Wrap them with foam pipe insulation (it splits down the middle and clips around the pipe) available at any hardware store for about $1 per foot. Pay special attention to any pipe that froze in a previous winter.
Step 3: Service your heating system
Replace the furnace filter a clogged filter makes your heating system work harder and use more energy. If you have a gas furnace or boiler, schedule a professional tune-up once every year or two. Bleed any radiators in a hot water system to release trapped air that reduces heating efficiency.
Step 4: Reverse your ceiling fans
Most ceiling fans have a small switch on the motor housing that reverses the blade direction. In winter mode (blades turning clockwise when viewed from below), the fan pushes warm air that has risen to the ceiling back down into the room. This can reduce heating costs by up to 10% in rooms with high ceilings.
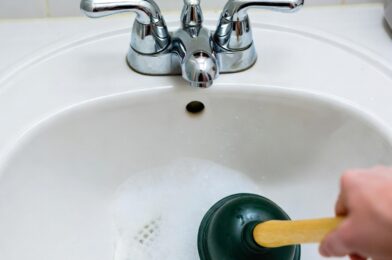
Step 5: Prepare outdoor plumbing
Disconnect and drain all garden hoses. Find the indoor shut-off valve for outdoor hose bibs (spigots) and close it, then open the outdoor faucet to drain any remaining water from the pipe. A frozen outdoor faucet can split the pipe inside the wall, causing significant damage when it eventually thaws.
Pro Tips
Check your attic insulation while you’re at it. If you can see the tops of the floor joists poking above the insulation, you need more. Proper attic insulation is the single most cost effective energy improvement in most homes.
Put a reminder in your calendar for the same weekend each fall. Winterization is most effective when it becomes a consistent annual habit rather than something done reactively after the first cold snap.
Final Thoughts
Winterizing your home takes half a day and costs between $20 and $100 in materials. The return on that investment comes every month of the heating season in lower utility bills and avoided repair costs. Do it once properly and it becomes a quick annual checklist rather than a stressful emergency response.