Painting a room is the single highest-impact home improvement project you can do for the least amount of money. A fresh coat of paint transforms a tired, dated room into something that feels completely new. And unlike most home improvement projects, painting is genuinely forgiving for beginners mistakes are easy to fix before the paint dries.
The difference between a professional-looking paint job and a messy one has almost nothing to do with skill. It’s almost entirely about preparation. Professional painters spend 60% of their time preparing the room and 40% actually painting. Keep that in mind as you read through this guide.
What You’ll Need
- Paint (calculate: one gallon covers roughly 400 square feet)
- Primer (especially important for dark colors or fresh drywall)
- 2-inch angled brush for cutting in
- Paint roller and tray
- Roller extension pole
- Painter’s tape (the blue kind)
- Drop cloths
- Sandpaper (fine grit)
- Damp cloth for cleaning walls
Step by Step Instructions:
Step 1: Prepare the room properly
Move furniture to the center of the room and cover it with drop cloths. Remove outlet covers, light switch plates, and any wall fixtures. Fill nail holes and small imperfections with spackle, let it dry, and sand smooth. Clean the walls with a damp cloth dust and grease prevent paint from sticking properly.
Step 2: Apply painter’s tape carefully
Run painter’s tape along the edges of trim, baseboards, ceilings, and window frames. Press the edge firmly with your finger or a putty knife to prevent paint from bleeding underneath. Good taping is what gives you those clean, sharp lines that make a room look professionally done.
Step 3: Apply primer
If you’re covering a dark color, painting new drywall, or making a dramatic color change, primer is not optional. Roll it on the same way you would paint, let it dry completely, then lightly sand with fine grit sandpaper for the smoothest possible surface for your top coat.
Step 4: Cut in first with a brush
Before using the roller, use your angled brush to paint a 2–3 inch band along all edges ceiling lines, corners, around trim, and anywhere the roller can’t reach. This is called cutting in, and doing it before rolling means the roller will blend seamlessly into the brushed areas while everything is still slightly wet.
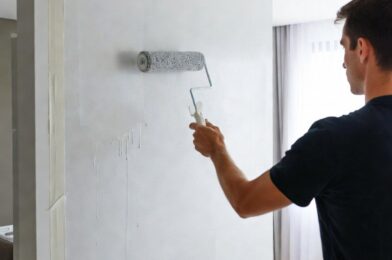
Step 5: Roll the walls in a W pattern
Load the roller with paint (don’t overload it, it should be coated but not dripping). Roll the paint onto the wall in a large W or M shape, then fill in the gaps without lifting the roller. This distributes paint evenly without lines. Work in sections about 3 feet wide from ceiling to floor. Let the first coat dry fully before applying a second coat.
Pro Tips
Never cut in one day and roll the next. The cut-in edges will dry and you’ll see a visible line where the brush met the roller. Always cut in and roll each wall in the same session while everything is wet.
For the cleanest lines, remove painter’s tape while the paint is still slightly wet, not after it has fully dried. Pull it back at a 45 degree angle, slowly and steadily.
Final Thoughts
Painting a room yourself saves $200-$500 compared to hiring a professional for a standard bedroom. With proper preparation and the right technique, the results will genuinely look professional. Take your time on the prep work and the painting itself will be easy.