Floating shelves look beautiful precisely because you can’t see what’s holding them up. No visible brackets, no hardware just a clean board attached to the wall as if by magic. The hidden mounting system isn’t complicated to build, and the result looks far more professional than any bracket shelf you can buy at a furniture store.
This guide covers building a solid floating shelf that can hold genuine weight books, plants, kitchen items not a decorative shelf that wobbles under anything heavier than a few picture frames.
What You’ll Need
- Lumber (1×8 or 1×10 board, cut to your desired length)
- French cleat or keyhole bracket system (hardware store)
- Stud finder
- Level
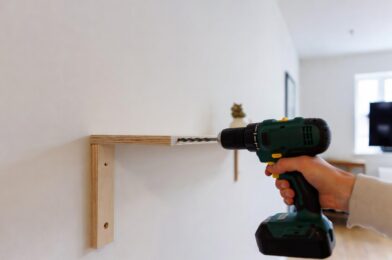
- Drill and bits
- 3-inch screws (for wall cleats into studs)
- Sandpaper (120 and 220 grit)
- Wood stain or paint
- Polyurethane finish (optional)
Step by Step Instructions :
Step 1: Find and mark the wall studs
Run your stud finder along the wall at shelf height and mark each stud location with a small pencil mark. For a strong shelf, you want to anchor into at least two studs. If your shelf span doesn’t align with studs, use toggle bolts rated for the weight you plan to carry.
Step 2: Prepare your shelf board
Sand the lumber starting with 120 grit, then finish with 220 grit for a smooth surface. Round the front edges slightly with sandpaper this removes the sharp factory edge and gives a more finished appearance. Apply your chosen finish: stain, paint, or natural oil. Let it dry completely before installation.
Step 3: Install the wall cleat
The wall cleat is a smaller piece of wood (usually 2×4 or a French cleat) that screws directly into the studs and then disappears inside the shelf. Hold it at your shelf height, level it carefully, and drive 3 inch screws through it into each stud. This cleat carries all the weight, so secure it well.
Step 4: Create the shelf to fit over the cleat
The shelf board needs to be routed or cut to accept the cleat. For a French cleat system, the shelf has a channel routed in its underside that slides over the wall-mounted cleat. For a simpler approach, drill horizontal holes through the back edge of the shelf that fit over dowels attached to the wall cleat.
Step 5: Hang and level the shelf
Slide or press the shelf onto the wall mounted cleat. Step back and check that it’s level (minor adjustments can be made by shimming). Once you’re satisfied with the position and level, secure the shelf to the cleat from underneath with a couple of short screws driven up through the cleat into the shelf bottom to prevent it lifting.
Pro Tips
Make the shelf slightly longer than you think you need. Once it’s on the wall, shelves tend to look smaller than they did in the store or in your head. A few extra inches of length looks better and gives you more usable space.
For very long shelves (over 36 inches), use three mounting points rather than two to prevent sagging in the middle under load over time.
Final Thoughts
A handmade floating shelf costs $15-$30 in materials and looks better than most store bought alternatives. Once you’ve built one, the technique becomes second nature and you’ll find yourself planning shelves for every room in the house.