Replacing a ceiling fan is one of those home improvement projects that looks complicated but is actually very manageable once you understand the wiring. The hardest part is usually working above your head on a ladder the electrical connections themselves are straightforward if you follow the steps carefully.
I replaced the ceiling fan in my bedroom last summer after the old one started wobbling so badly it kept me awake at night. The new one went up in about an hour and has been perfectly balanced ever since. Here is exactly how I did it.
What You’ll Need
- New ceiling fan (ensure it matches your existing mounting bracket size, or buy a universal mount)
- Screwdrivers (Phillips and flathead)
- Wire stripper
- Non contact voltage tester
- Needle nose pliers
- Ladder tall enough to reach the ceiling comfortably
- Electrical tape
- Masking tape and marker for labeling wires
Step by Step Instructions :
Step 1: Turn off power at the circuit breaker
Go to your electrical panel and switch off the circuit that powers the room. Then flip the wall switch to confirm the old fan stops. Use your non contact voltage tester at the ceiling wires to confirm zero voltage before touching anything. Never skip this verification step.
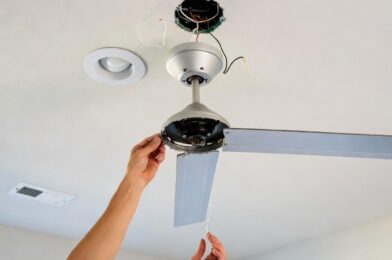
Step 2: Remove the old fan
Support the old fan motor with one hand while you unscrew the canopy (the decorative cover at the ceiling). Once the canopy is loose, you will see the wiring connections. Most fans use wire nuts to connect the wires together. Untwist them carefully and lower the fan. Have someone help you hold it if it is heavy.
Step 3: Check the existing mounting bracket
Ceiling fans are heavier than light fixtures and require a fan rated electrical box mounted to a ceiling joist or a special brace. If the existing box is rated for fans (it will say so on the box or be made of metal with a brace), you can reuse it. If it is a standard plastic light box, replace it with a fan rated box before continuing.
Step 4: Assemble the new fan
Follow the manufacturer instructions to assemble the fan motor, blades, and blade brackets before mounting. Assemble everything you can on the ground this saves significant time and effort compared to assembling it above your head on a ladder. Attach the canopy and hanging ball or downrod as directed.
Step 5: Connect the wiring
Hang the new fan temporarily on the mounting hook while you connect the wires this frees both hands for the wiring. Match wire colors: black to black (hot), white to white (neutral), and bare copper or green to green or bare copper (ground). If your fan has a blue wire (for a separate light kit), connect it to the black house wire as well, or cap it with a wire nut if you have no light kit.
Step 6: Secure the fan and test
Tuck the wires into the electrical box, secure the canopy, and tighten all mounting screws. Restore power at the breaker and test both the fan and light using the pull chains or wall switch. Check that the fan runs smoothly on all speeds without wobbling. Most new fans include a balancing kit small clip on weights for fine-tuning if needed.
Pro Tips
If your ceiling fan wobbles after installation, first check that all blade screws are tightened equally. Unequal screw tension is the most common cause of wobbling, not imbalanced blades.
In winter, use the reverse switch on the fan motor to make blades spin clockwise. This pushes warm air that has risen to the ceiling back down into the living space and can reduce heating costs noticeably.
Final Thoughts
Installing a ceiling fan is a satisfying upgrade that improves comfort in any room throughout the year. Take your time on the wiring connections, make sure you have a fan-rated electrical box, and the rest of the job is straightforward assembly. Your biggest challenge will be working on the ladder so set it up safely and take breaks if your neck gets tired from looking up.