How to Paint Kitchen Cabinets Without Brush Marks (Transform Your Kitchen for Under $100)

Painting kitchen cabinets is one of the highest impact transformations you can make to a home and one of the most budget-friendly. A professional kitchen cabinet painting job costs $1,500 to $4,000. Doing it yourself costs $50 to $150 in materials and a weekend of focused work.

The results can be genuinely stunning if you follow the right process. The keyword is preparation. Cabinets that look painted with a brush after a DIY job almost always suffered from skipped prep steps. Do the prep right and your cabinets will look factory sprayed.

What You’ll Need

  • Cabinet-specific primer (Zinsser BIN or similar)
  • Cabinet paint semi gloss or satin finish (Benjamin Moore Advance or similar water based alkyd)
  • Small foam roller (4 inch)
  • Angled brush for detail areas
  • Liquid deglosser or TSP cleaner
  • Sandpaper (120 and 220 grit)
  • Screwdriver to remove doors and hardware
  • Painter’s tape
  • Drop cloths
  • Small containers for paint (easier than working from the can)

Step by Step Instructions:

Step 1: Remove all doors, drawers, and hardware

Take every door off its hinges and remove all drawers. Label the back of each door and drawer with a number so you know exactly where each one goes back. Remove all knobs, pulls, and hinges. Work on doors and drawer fronts horizontally on sawhorses or a flat surface painting them flat eliminates runs and drips completely.

Step 2: Clean everything thoroughly

Kitchen cabinets accumulate years of grease, cooking oils, and grime that will prevent paint from bonding. Wipe every surface with a liquid deglosser or a strong TSP (trisodium phosphate) solution. This step is non negotiable paint applied over grease will peel within months regardless of how many coats you apply.

Step 3: Sand lightly for adhesion

Lightly sand all surfaces with 120 grit sandpaper to scuff the existing finish. You are not trying to remove the old finish entirely just roughing it up so the primer has something to grip. Wipe away all sanding dust with a tack cloth or damp rag and allow to dry completely.

Step 4: Apply primer and sand again

Apply a thin, even coat of cabinet specific primer to all surfaces. Let it dry fully according to manufacturer directions. Then sand lightly with 220 grit sandpaper this removes any raised grain or brush marks from the primer and creates an incredibly smooth surface for the topcoat. Wipe clean with a tack cloth.

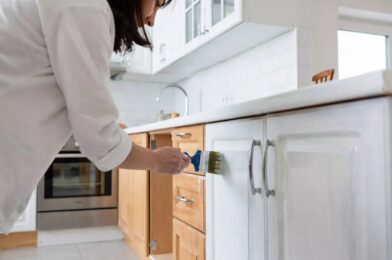
Step 5: Apply paint with a foam roller and brush

Use the foam roller for flat panel areas it leaves almost no texture compared to a standard roller. Use the angled brush for edges, grooves, and recessed areas. Apply thin coats and resist the urge to overwork the paint. Cabinet paint levels itself as it dries, filling in brush strokes. Let each coat dry fully before applying the next. Two or three thin coats produce a far better result than one heavy coat.

Step 6: Reassemble after full cure

Cabinet paint takes 24 hours to dry but 2 to 4 weeks to fully cure and harden. Reattach doors and drawers after 24 to 48 hours but treat them gently for the first month. Slamming uncured cabinet doors can cause the paint to stick, crack, or mark. Install new hardware for a complete transformation.

Pro Tips

The brand of paint matters significantly for cabinets. Standard wall paint is too soft and will chip quickly on cabinet surfaces that are touched hundreds of times a day. Use a paint specifically formulated for cabinets and trim Benjamin Moore Advance, Sherwin Williams Emerald Urethane, and Rust Oleum Cabinet Transformations are all well regarded options.

If your cabinets have a shiny factory finish, the liquid deglosser is even more important than sanding. It chemically dulls the surface so the primer can bond properly.

Final Thoughts

Painting your kitchen cabinets is genuinely transformative. Old oak cabinets from the 1990s can look completely modern after a coat of white or gray paint. The project requires patience and careful preparation but no special skills. Budget a full weekend, follow the process, and you will end up with a kitchen that looks thousands of dollars more expensive than it actually cost.

How to Install a New Toilet Yourself :Replacement Guide

Replacing a toilet sounds like a job for a plumber, but it is genuinely one of the most DIY friendly plumbing jobs there is. There are no pipes to cut, no soldering, and no special skills required. The whole process involves disconnecting the old toilet, dropping the new one in place, and making three simple connections.

Most homeowners who have never touched a toilet installation complete this job successfully in two to three hours. The heaviest part is lifting the old toilet out and the new one in so having a second person helps, but it is manageable alone.

What You’ll Need

  • New toilet (measure the rough in distance first most are 12 inches from wall to bolt center)
  • New wax ring (usually included with toilet or buy separately for a few dollars)
  • Adjustable wrench
  • Screwdriver
  • Utility knife
  • Sponge and bucket
  • Rubber gloves
  • Putty knife
  • Hacksaw (in case old closet bolts are too long)

Step by Step Instructions:

Step 1: Shut off the water and drain the toilet

Turn the shut-off valve behind the toilet clockwise until it stops. Flush the toilet to drain as much water as possible from the tank and bowl. Use a sponge to soak up any remaining water in the bowl and tank you want both as dry as possible before moving the toilet. Disconnect the water supply line from the bottom of the tank.

Step 2: Remove the old toilet

Pry off the plastic caps at the base of the toilet to expose the nuts on the closet bolts. Remove the nuts with an adjustable wrench. The toilet is now only held by gravity and the old wax ring. Rock it gently side to side to break the wax seal, then lift it straight up and set it aside on old newspaper or a drop cloth. Have a helper for this a full porcelain toilet is heavy.

Step 3: Prepare the flange

The floor flange is the fitting in the floor that the toilet bolts to. Clean all the old wax off it with a putty knife. Inspect the flange for cracks or damage a damaged flange needs to be repaired before the new toilet goes in. Insert new closet bolts into the slots in the flange, positioning them so they are equidistant from the wall.

Step 4: Install the new wax ring

Place the new wax ring on top of the flange with the wax side facing up, or press it to the underside of the new toilet either method works. The wax ring creates a waterproof seal between the toilet and the drain. Use only one wax ring stacking two creates a weaker, less reliable seal.

Step 5: Set the new toilet

With a helper guiding the closet bolts through the holes in the toilet base, lower the toilet straight down onto the flange. Press firmly downward do not rock it side to side, as this distorts the wax seal. Sit on the toilet briefly to press it fully into the wax. Hand-tighten the nuts onto the closet bolts, then snug them with a wrench. Alternate sides to keep even pressure. Do not overtighten you will crack the porcelain base.

Step 6: Connect water supply and test

Attach the water supply line to the bottom of the tank. Turn on the shut off valve slowly and let the tank fill. Check every connection point for drips. Flush several times and watch the base carefully for any water on the floor, which would indicate a wax ring leak. Apply a bead of caulk around the base of the toilet for a clean finished look, leaving a small gap at the back to allow leak detection.

Pro Tips

Before buying your new toilet, measure the rough-in distance the distance from the wall to the center of the closet bolts or the drain pipe. Most homes use a 12 inch rough in but some older homes use 10 or 14 inches. Installing a toilet with the wrong rough-in measurement means it will not fit properly.

If the closet bolts that came with your new toilet are too long after installation, use a hacksaw to cut them flush with the top of the nut. Long protruding bolts prevent the decorative caps from fitting properly.

Final Thoughts

Replacing a toilet is one of those DIY accomplishments that seems more impressive than it is. Once you have done it, you will wonder why anyone pays a plumber for this job. The whole process costs the price of the toilet and wax ring save hundreds of dollars and gain the confidence to tackle bigger plumbing projects next.