A kitchen or bathroom backsplash makes an enormous difference in how a room looks. The problem is that traditional tile installation requires grout, adhesive, tile saws, and a fair amount of skill. Peel-and-stick backsplash tiles change all of that. You can transform your kitchen in a single afternoon without any special tools, no mess, and no permanent commitment.
I installed a peel-and-stick backsplash in my rental apartment kitchen two years ago. The whole project took about 3 hours, cost around $60, and completely changed the look of the kitchen. When I eventually moved out, it came off cleanly without damaging the wall underneath.
What You’ll Need
- Peel-and-stick backsplash tiles (measure your space first)
- Measuring tape
- Pencil
- Level or straight edge
- Utility knife or scissors
- Squeegee or credit card
- Rubbing alcohol and clean cloth
- Hairdryer (optional, for corners)
Step by Step Instructions :
Step 1: Measure and plan your layout
Measure the total area you want to cover in square feet and buy 10–15% more tiles than you think you need (for cuts and mistakes). Plan where you want to start most people begin at the center of the backsplash area and work outward so the cuts on each side are equal.
Step 2: Clean the surface thoroughly
This is the most important step for peel-and-stick tiles. Wipe the entire surface with rubbing alcohol on a clean cloth. Any grease, dust, or moisture will weaken the adhesive and tiles will start peeling off within weeks. Let it dry completely before starting.
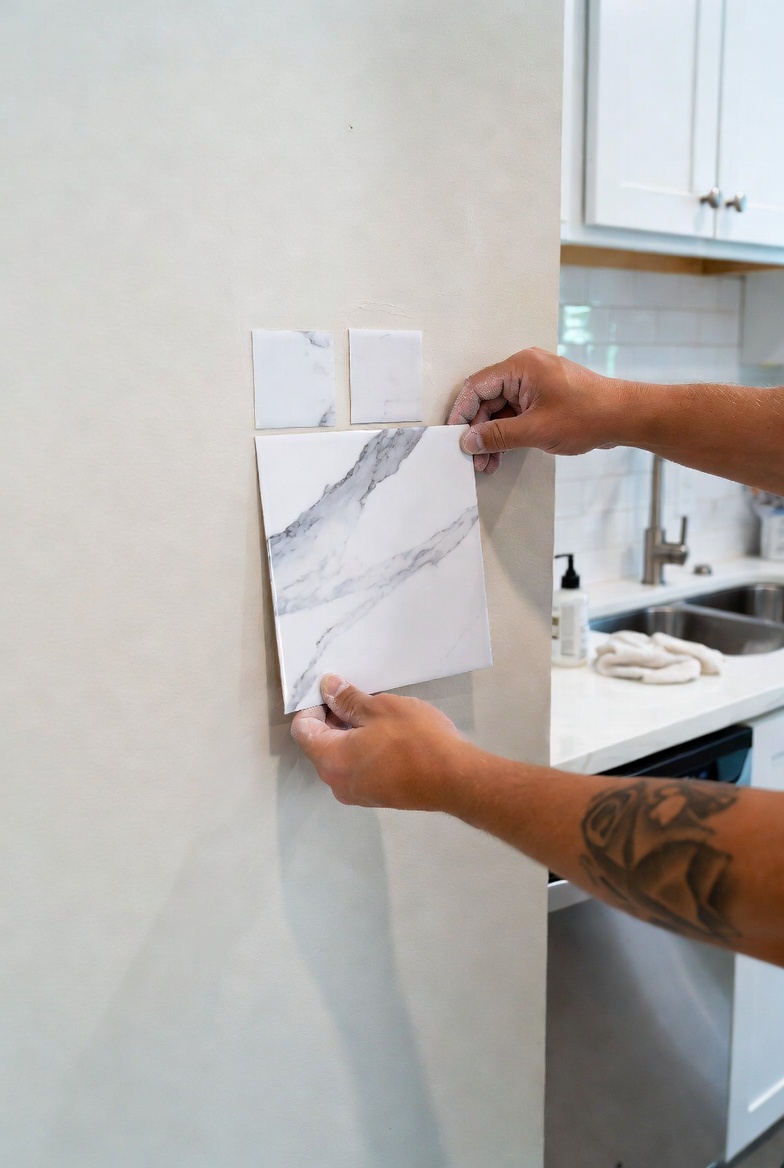
Step 3: Start with a straight reference line
Use a level to draw a faint pencil line as your starting guide. Even a small amount of tilt at the beginning becomes very obvious by the time you’ve placed 10 tiles. This straight line takes 2 minutes and saves a lot of frustration.
Step 4: Peel and press each tile firmly
Peel the backing off one tile at a time. Align it carefully with your reference line and press it firmly against the wall, working from the center outward to avoid air bubbles. Use a squeegee or credit card to press out any bubbles as you go.
Step 5: Cut tiles for edges and outlets
For the edges and around outlets or switches, measure carefully, mark the cut line with a pencil, and cut with a utility knife. For curved cuts around outlets, score the line several times and snap the tile. Take your time with cuts they’re what separates a neat installation from a messy one.
Pro Tips
Warm the tiles slightly with a hairdryer before applying them in cold weather. The adhesive bonds much better when the tile and wall are both at room temperature or slightly warm.
Don’t install directly over a painted surface that is peeling or flaking. The tiles will pull the old paint off with them when removed. Sand and stabilize any loose paint first.
Final Thoughts
Peel and stick backsplash tiles are one of the best DIY upgrades for renters and homeowners alike. The transformation is dramatic, the cost is low, and the installation requires no skills beyond patience and a steady hand. Your kitchen or bathroom will look completely different by the end of the afternoon.