15 Common DIY Home Improvement Mistakes Beginners Make

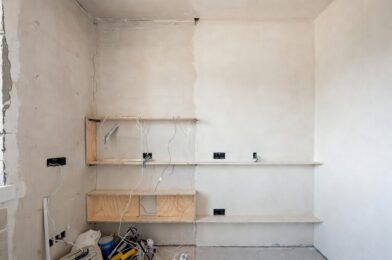
Every experienced DIYer has a list of mistakes they made as a beginner. The good news is that most of these mistakes are not dangerous or catastrophic they’re just time consuming and sometimes costly to fix. The even better news is that knowing about them in advance means you don’t have to learn them the hard way.

This is the article I wish someone had handed me when I started doing home repairs. Some of these are obvious in hindsight. Others are genuinely counterintuitive. All of them have cost real people real time and money.

1. Skipping the preparation

In virtually every home improvement project, preparation takes more time than the actual work. Cleaning, taping, sanding, priming these steps are what separate professional results from amateur ones. When beginners skip prep to save time, they usually end up spending more time fixing problems caused by skipping it.

2. Underestimating how long things take

Everything takes longer than you think it will. A job that sounds like one hour usually takes three when you account for measuring, trips to the hardware store, problems you didn’t anticipate, and cleanup. Add at least 50% to whatever time estimate you have for any project.

3. Buying the wrong amount of materials

Buying too little means a second trip to the hardware store when you’re mid-project. Buying too much wastes money. For flooring and paint, always add 10% for waste and mistakes. For tile, add 15% because cuts waste more material.

4. Not turning off the power or water before starting

This seems obvious but it’s skipped more than you’d think, usually because people don’t want to inconvenience themselves or others. Turning off a circuit or water supply takes 30 seconds and prevents injury, flooding, and expensive repairs.

5. Using the wrong tool for the job

Using a flathead screwdriver on a Phillips screw strips the head. Using a regular drill bit on tile cracks it. Using interior caulk outdoors causes it to fail within months. Taking 5 minutes to confirm you have the right tool prevents hours of frustration.

6. Ignoring the instruction manual

Whether it’s a new tool, a building product, or a repair kit, the instructions exist for a reason. Manufacturers know exactly how their products perform best and what causes failures. Deviating from instructions usually leads to worse results and voids warranties.

7. Painting without priming

Primer is not an optional step before paint. Without it, paint doesn’t bond as well, colors don’t look true, and you’ll need more coats to get a solid finish. Primer is especially important on new drywall, over dark colors, and over repaired surfaces.

8. Overtightening screws and bolts

Tighter is not always better. Overtightening screws in wood causes them to strip or crack the material. Overtightening plumbing fittings cracks them or crushes the washer. Most connections need to be firm and snug, not as tight as physically possible.

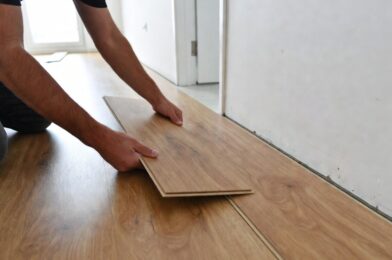
9. Not measuring twice

The old saying is a cliché because it’s true. A measurement error on a cut piece of wood means a new piece of wood. On tile, it can mean an entirely new tile. Measure twice, mark clearly, and verify against the actual space before cutting anything.

10. Choosing paint color only from a small chip

Paint colors look dramatically different on a wall than they do on a 1 inch paint chip under store lighting. Always buy a small sample pot and paint a 12 inch square on the actual wall before committing to a full gallon. Look at it in daylight and at night under artificial light.

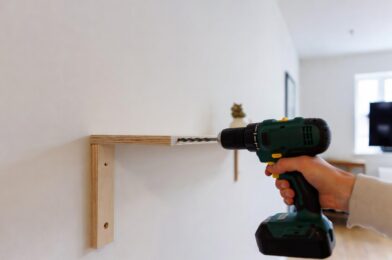
11. Anchoring into drywall without hitting studs

Drywall alone cannot support significant weight. A screw in drywall without a stud or proper anchor will pull out under load, taking a chunk of wall with it. Use a stud finder for anything heavy. For items that fall between studs, use proper wall anchors rated for the weight you’re hanging.

12. Applying new caulk over old caulk

This approach always fails. New caulk does not bond well to old caulk, and the result peels away quickly. Remove all old caulk completely before applying fresh material the extra time is absolutely worth it for a repair that actually lasts.

13. Starting a project without a clear plan

Beginning a project without thinking through every step often leads to getting stuck midway through, with a half-finished job that can’t be left as is. Read the entire process through before starting. Know what tools and materials you need. Understand each step before you begin the previous one.

14. Hiring the cheapest contractor

For the jobs you do hire out, the lowest quote is almost never the best value. Contractors who price significantly below others are usually cutting corners somewhere. Get three quotes for any significant work and research reviews before deciding.

15. Not cleaning up tools and materials properly

Paint rollers left to dry are ruined. Drill bits left in damp areas rust. Caulk tubes not properly sealed dry out. Cleaning and storing tools correctly after every project extends their life significantly and means they’re ready and functional when you need them next.

Keep a small notebook or use your phone notes to document what you’ve done in your home which paint color you used in which room, which faucet model you installed, where the main water shut off is. This information is invaluable for future repairs and maintenance.

Join an online community like r/DIY or a local home improvement Facebook group. Being able to ask questions and see how others approach problems is enormously helpful when you’re starting out.

Every mistake on this list is survivable. Most cost some time and some money but nothing catastrophic. The goal isn’t to be perfect on your first project it’s to learn from each job and get a little better and a little faster with every repair you tackle. That’s what home improvement experience actually looks like.

How to Install Laminate Flooring for Beginners (Complete Step by Step Guide)

Laminate flooring is one of the most beginner-friendly flooring options available. It’s affordable, durable, looks great, and unlike hardwood or tile, it doesn’t require adhesive, grout, or special skills to install. The planks click together using a floating floor method, which means the whole floor essentially snaps together like a large puzzle.

I installed laminate floors in my living room and hallway over a long weekend. The finished result looks genuinely professional and I paid less than half what a flooring company quoted me. Here’s how it’s done.

What You’ll Need

  • Laminate flooring planks (measure room in sq ft + 10% for waste)
  • Underlayment (often included with laminate)
  • Tape measure and pencil
  • Circular saw or jigsaw
  • Pull bar and tapping block (laminate installation kit, about $15)
  • Spacers (quarter-inch) for expansion gap
  • Rubber mallet
  • Safety glasses

Step by Step Instructions :

Step 1: Prepare the subfloor

The subfloor must be clean, dry, and flat. Vacuum thoroughly and check for high spots (sand them down) or low spots (fill with floor leveling compound). Any unevenness greater than 3/16 of an inch over 10 feet will cause laminate to bounce or produce hollow sounds underfoot.

Step 2: Acclimate the flooring

Leave the unopened boxes of laminate in the room where they’ll be installed for 48 hours before starting. Wood-based materials expand and contract with temperature and humidity changes. Acclimating them to the room’s conditions prevents buckling or gaps from appearing after installation.

Step 3: Lay the underlayment

Roll out the underlayment foam across the entire floor, trimming it to fit. Tape the seams with the provided tape. Do not overlap sections overlapping creates high spots. The underlayment provides cushion, sound reduction, and a moisture barrier.

Step 4: Install the first row carefully

Start along the longest, straightest wall. Place quarter inch spacers against the wall (this expansion gap is essential without it, the floor will buckle as wood expands in warm weather). Lay the first row with the tongue side facing the room. The first row sets the alignment for everything that follows take time to get it perfectly straight.

Step 5: Click and lock subsequent rows

Stagger the end joints of each row by at least 12 inches from the joints in the previous row (this is both structural and aesthetic). Connect each plank by angling the tongue into the groove of the previous row and pressing down to click it into place. Use the tapping block and rubber mallet to close any gaps. The last row will likely need to be cut lengthwise to fit.

Pro Tips

Cut laminate with the finished side facing up when using a hand saw, and finished side facing down when using a circular saw or jigsaw. This prevents the blade from chipping the visible surface.

Never glue laminate flooring unless the manufacturer specifically requires it. It’s a floating floor it needs to be able to move slightly with temperature changes, and gluing prevents that.

Final Thoughts

Laminate flooring installation is a realistic weekend project for most homeowners. The prep work is the most important part a well prepared subfloor makes the installation smooth and the result long-lasting. Take your time on the first row and the rest of the floor will follow naturally.

How to Build a Simple Floating Shelf (Strong, Clean, and No Visible Hardware)

Floating shelves look beautiful precisely because you can’t see what’s holding them up. No visible brackets, no hardware just a clean board attached to the wall as if by magic. The hidden mounting system isn’t complicated to build, and the result looks far more professional than any bracket shelf you can buy at a furniture store.

This guide covers building a solid floating shelf that can hold genuine weight books, plants, kitchen items not a decorative shelf that wobbles under anything heavier than a few picture frames.

What You’ll Need

  • Lumber (1×8 or 1×10 board, cut to your desired length)
  • French cleat or keyhole bracket system (hardware store)
  • Stud finder
  • Level
  • Drill and bits
  • 3-inch screws (for wall cleats into studs)
  • Sandpaper (120 and 220 grit)
  • Wood stain or paint
  • Polyurethane finish (optional)

Step by Step Instructions :

Step 1: Find and mark the wall studs

Run your stud finder along the wall at shelf height and mark each stud location with a small pencil mark. For a strong shelf, you want to anchor into at least two studs. If your shelf span doesn’t align with studs, use toggle bolts rated for the weight you plan to carry.

Step 2: Prepare your shelf board

Sand the lumber starting with 120 grit, then finish with 220 grit for a smooth surface. Round the front edges slightly with sandpaper this removes the sharp factory edge and gives a more finished appearance. Apply your chosen finish: stain, paint, or natural oil. Let it dry completely before installation.

Step 3: Install the wall cleat

The wall cleat is a smaller piece of wood (usually 2×4 or a French cleat) that screws directly into the studs and then disappears inside the shelf. Hold it at your shelf height, level it carefully, and drive 3 inch screws through it into each stud. This cleat carries all the weight, so secure it well.

Step 4: Create the shelf to fit over the cleat

The shelf board needs to be routed or cut to accept the cleat. For a French cleat system, the shelf has a channel routed in its underside that slides over the wall-mounted cleat. For a simpler approach, drill horizontal holes through the back edge of the shelf that fit over dowels attached to the wall cleat.

Step 5: Hang and level the shelf

Slide or press the shelf onto the wall mounted cleat. Step back and check that it’s level (minor adjustments can be made by shimming). Once you’re satisfied with the position and level, secure the shelf to the cleat from underneath with a couple of short screws driven up through the cleat into the shelf bottom to prevent it lifting.

Pro Tips

Make the shelf slightly longer than you think you need. Once it’s on the wall, shelves tend to look smaller than they did in the store or in your head. A few extra inches of length looks better and gives you more usable space.

For very long shelves (over 36 inches), use three mounting points rather than two to prevent sagging in the middle under load over time.

Final Thoughts

A handmade floating shelf costs $15-$30 in materials and looks better than most store bought alternatives. Once you’ve built one, the technique becomes second nature and you’ll find yourself planning shelves for every room in the house.

How to Install Peel and Stick Backsplash Tiles (No Grout, No Mess)

A kitchen or bathroom backsplash makes an enormous difference in how a room looks. The problem is that traditional tile installation requires grout, adhesive, tile saws, and a fair amount of skill. Peel-and-stick backsplash tiles change all of that. You can transform your kitchen in a single afternoon without any special tools, no mess, and no permanent commitment.

I installed a peel-and-stick backsplash in my rental apartment kitchen two years ago. The whole project took about 3 hours, cost around $60, and completely changed the look of the kitchen. When I eventually moved out, it came off cleanly without damaging the wall underneath.

What You’ll Need

  • Peel-and-stick backsplash tiles (measure your space first)
  • Measuring tape
  • Pencil
  • Level or straight edge
  • Utility knife or scissors
  • Squeegee or credit card
  • Rubbing alcohol and clean cloth
  • Hairdryer (optional, for corners)

Step by Step Instructions :

Step 1: Measure and plan your layout

Measure the total area you want to cover in square feet and buy 10–15% more tiles than you think you need (for cuts and mistakes). Plan where you want to start most people begin at the center of the backsplash area and work outward so the cuts on each side are equal.

Step 2: Clean the surface thoroughly

This is the most important step for peel-and-stick tiles. Wipe the entire surface with rubbing alcohol on a clean cloth. Any grease, dust, or moisture will weaken the adhesive and tiles will start peeling off within weeks. Let it dry completely before starting.

Step 3: Start with a straight reference line

Use a level to draw a faint pencil line as your starting guide. Even a small amount of tilt at the beginning becomes very obvious by the time you’ve placed 10 tiles. This straight line takes 2 minutes and saves a lot of frustration.

Step 4: Peel and press each tile firmly

Peel the backing off one tile at a time. Align it carefully with your reference line and press it firmly against the wall, working from the center outward to avoid air bubbles. Use a squeegee or credit card to press out any bubbles as you go.

Step 5: Cut tiles for edges and outlets

For the edges and around outlets or switches, measure carefully, mark the cut line with a pencil, and cut with a utility knife. For curved cuts around outlets, score the line several times and snap the tile. Take your time with cuts they’re what separates a neat installation from a messy one.

Pro Tips

Warm the tiles slightly with a hairdryer before applying them in cold weather. The adhesive bonds much better when the tile and wall are both at room temperature or slightly warm.

Don’t install directly over a painted surface that is peeling or flaking. The tiles will pull the old paint off with them when removed. Sand and stabilize any loose paint first.

Final Thoughts

Peel and stick backsplash tiles are one of the best DIY upgrades for renters and homeowners alike. The transformation is dramatic, the cost is low, and the installation requires no skills beyond patience and a steady hand. Your kitchen or bathroom will look completely different by the end of the afternoon.

10 Essential Tools Every Homeowner Should Have (And What to Use Them For)

You don’t need a workshop full of equipment to handle most home repairs. A well chosen set of 10 basic tools will handle the overwhelming majority of common household jobs from hanging pictures to fixing leaky faucets to assembling furniture to patching walls.

I’ve been doing home repairs for over a decade, and these are the tools I reach for constantly. Everything on this list is available at any hardware store, and the entire collection costs around $100-$150 if bought new. Many of these can be found used for much less.

The Full List :

1. Hammer

A 16-oz claw hammer handles everything from hanging pictures to light demolition. The claw end removes nails cleanly. Look for one with a comfortable rubber grip you’ll feel the difference during extended use. This is the single most fundamental tool in any home.

2. Screwdriver set

Buy a set that includes multiple sizes of both Phillips (cross-head) and flathead (straight) screwdrivers. You’ll use these weekly. A magnetic tip is worth a few extra dollars it holds screws in place while you drive them, which is invaluable in tight spaces.

3. Tape measure (25 feet)

A 25 foot tape measure handles everything from measuring rooms for furniture to cutting lumber. The lock button keeps the tape extended while you work alone. Learn to read both the inch fractions and the 16-inch stud spacing marks they’ll save you time on many projects.

4. Adjustable wrench

One good adjustable wrench replaces a whole set of fixed-size wrenches for most home repair purposes. Use it for plumbing repairs, tightening bolts, and countless other tasks. An 8-inch or 10-inch adjustable wrench covers the range of sizes you’ll encounter most often.

5. Utility knife

A utility knife with replaceable blades cuts everything from drywall to carpet to cardboard to packaging. Keep a pack of spare blades a sharp blade makes cleaner cuts and is actually safer than a dull one that requires extra force and can slip.

6. Level

A 24-inch level ensures your shelves, pictures, and installations are perfectly horizontal or vertical. Nothing looks worse than a shelf that’s clearly tilted. Even a small 9-inch torpedo level works for most household tasks if counter space is limited.

7. Power drill and bits

A cordless drill is arguably the most versatile tool you can own. It drives screws, drills holes, and with the right attachment can mix paint, drive bolts, and more. Buy one with at least two batteries so one is always charged. A basic set of drill bits and screwdriver bits is usually included.

8. Pliers

A set that includes needle-nose pliers (for electrical work and tight spaces), standard slip-joint pliers (for general gripping), and locking pliers (Vise-Grips) covers essentially every situation. These come up constantly in plumbing, electrical, and assembly work.

9. Stud finder

When hanging anything heavy on a wall shelves, TVs, cabinets you need to anchor into the wall studs, not just the drywall. A basic electronic stud finder costs about $15 and prevents the expensive mistake of having a heavy shelf pull out of the wall and damage the drywall.

10. Caulk gun and caulk

A basic caulk gun and a few tubes of caulk (one silicone for bathrooms and kitchens, one paintable for trim and windows) handle sealing, weatherproofing, and finishing work around the entire house. This combination is used more frequently than most people expect.

Pro Tips

Buy quality where it matters most: screwdrivers, drill, and tape measure are worth spending a bit more on since you’ll use them constantly. For specialty tools you’ll use rarely, a budget option is fine.

Store your tools in one dedicated place a toolbox, a drawer, or a wall mounted organizer. Half the frustration of home repair projects comes from not being able to find the right tool when you need it.

Final Thoughts

With these 10 tools, you can handle approximately 80% of common household repairs and projects without calling a professional. Start with the basics and add specialty tools as specific projects require them. A good set of hand tools is one of the best long term investments a homeowner can make.