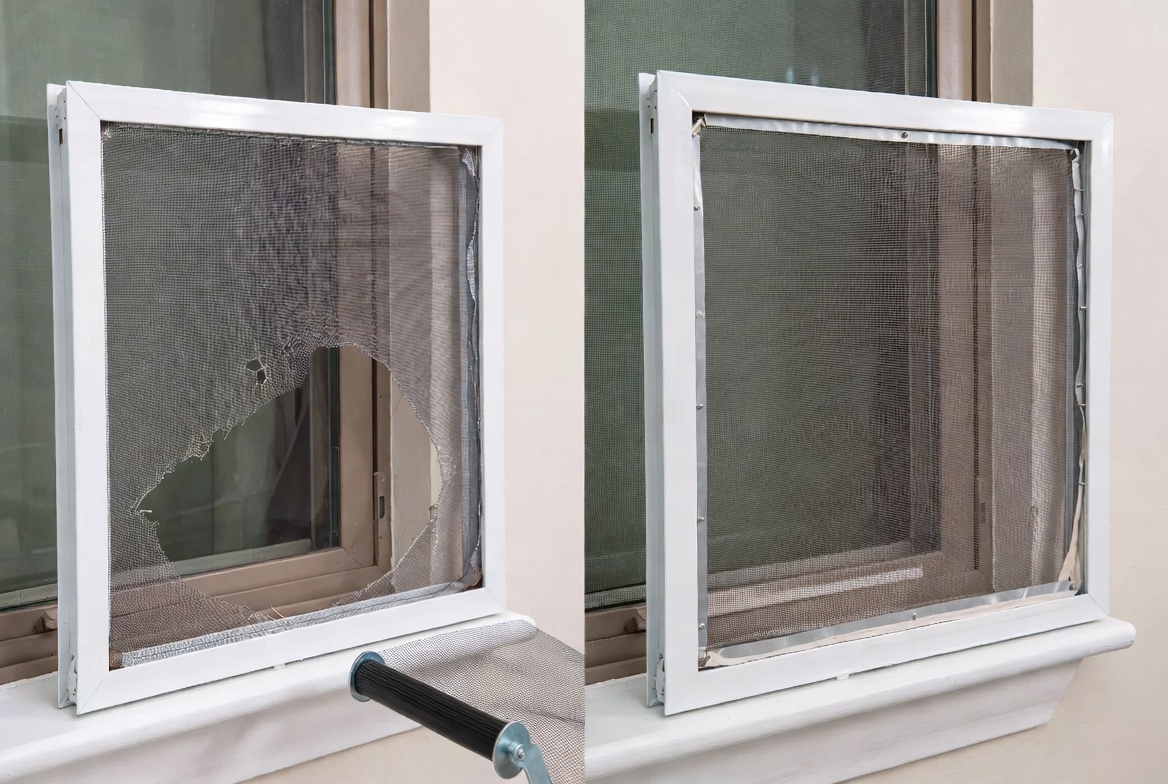
A torn or damaged window screen lets insects into your home and looks untidy from inside and out. Most homeowners assume replacing a screen requires buying a whole new screen assembly or calling someone. In reality, rescreening a window is a simple, inexpensive job that takes about 20 minutes per screen and costs around $5 to $10 in materials.
I rescreened four windows in my house one Saturday afternoon. By the end I had found a rhythm and each one took less than 15 minutes. The total cost was about $20 for all four.
What You’ll Need
- Replacement screen mesh (fiberglass mesh is easiest for beginners)
- Spline the rubber cord that holds the screen in the frame (buy the same size as the old spline)
- Spline roller tool (costs about $3 at any hardware store)
- Utility knife or scissors
- Flathead screwdriver
- Work surface (a table or flat ground)
Step by Step Instructions:
Step 1: Remove the old screen and spline
Lay the screen frame on a flat surface. Find the end of the rubber spline it usually starts at a corner. Use a flathead screwdriver to pry up one end and then pull the entire spline out of the groove that runs around the inside edge of the frame. The old screen mesh will come loose. Pull it away and discard it.
Step 2: Inspect the frame and groove
Check the frame for any bent corners or damage. Aluminum frames can be straightened by hand if slightly bent. Clean out the spline groove with a cloth debris in the groove prevents the new spline from seating properly and causes the screen to come loose over time.
Step 3: Cut and position new screen mesh
Cut a piece of new screen mesh about 2 inches larger than the frame on all sides. Lay it flat over the frame, centered so the excess overhangs evenly on all sides. If the mesh has a visible weave pattern, align it straight with the frame edges crooked mesh looks unprofessional.
Step 4: Roll the spline into the groove
Starting at one corner, use the convex wheel of the spline roller to press the screen into the groove, then run the spline cord on top of it and press it in firmly with the concave wheel. Work around the frame in order one long side, then the opposite long side, then the two short sides. Keep the screen taut as you go but do not stretch it so hard that it deforms the frame.
Step 5: Trim the excess screen
Once all four sides are splined, use a utility knife to trim the excess screen flush along the outside edge of the spline. Hold the knife at a slight angle so the cut is clean and inside the spline line. Pull gently on the cut edge if the screen is secure, it will not move.
Pro Tips
Fiberglass screen mesh is much easier to work with than aluminum mesh for beginners. It does not crease, it is more forgiving of minor errors, and it is generally less expensive. Aluminum mesh is more durable but requires more precise technique.
If the corners of the spline keep popping up, use a small flathead screwdriver to press them down into the groove while holding the spline in place. Some people use a tiny drop of super glue at each corner to keep them from lifting.
Final Thoughts
Window screen repair is one of the fastest and most satisfying small home repairs you can do. For about $5 and 20 minutes of work, a screen that looks terrible becomes essentially new again. Once you have the spline roller and a roll of mesh, you can rescreen every damaged screen in the house for very little money.