There’s something quietly maddening about a leaky faucet. That slow, rhythmic drip you hear at 2am the one that sounds louder the more you try to ignore it. I know the feeling. My kitchen faucet started dripping last winter and I kept telling myself I’d call someone. Two weeks later, I finally just fixed it myself. Took me about 45 minutes, cost me less than $8, and honestly I felt pretty proud afterward.
The good news is that most faucet leaks come from one small part that wears out over time. You don’t need plumbing experience. You just need a few basic tools and a little patience.
What You’ll Need
- Adjustable wrench
- Flathead and Phillips screwdrivers
- Replacement washers and O-rings (under $5 at any hardware store)
- Plumber’s grease
- A small bowl or towel to catch water
Step-by-Step Instructions
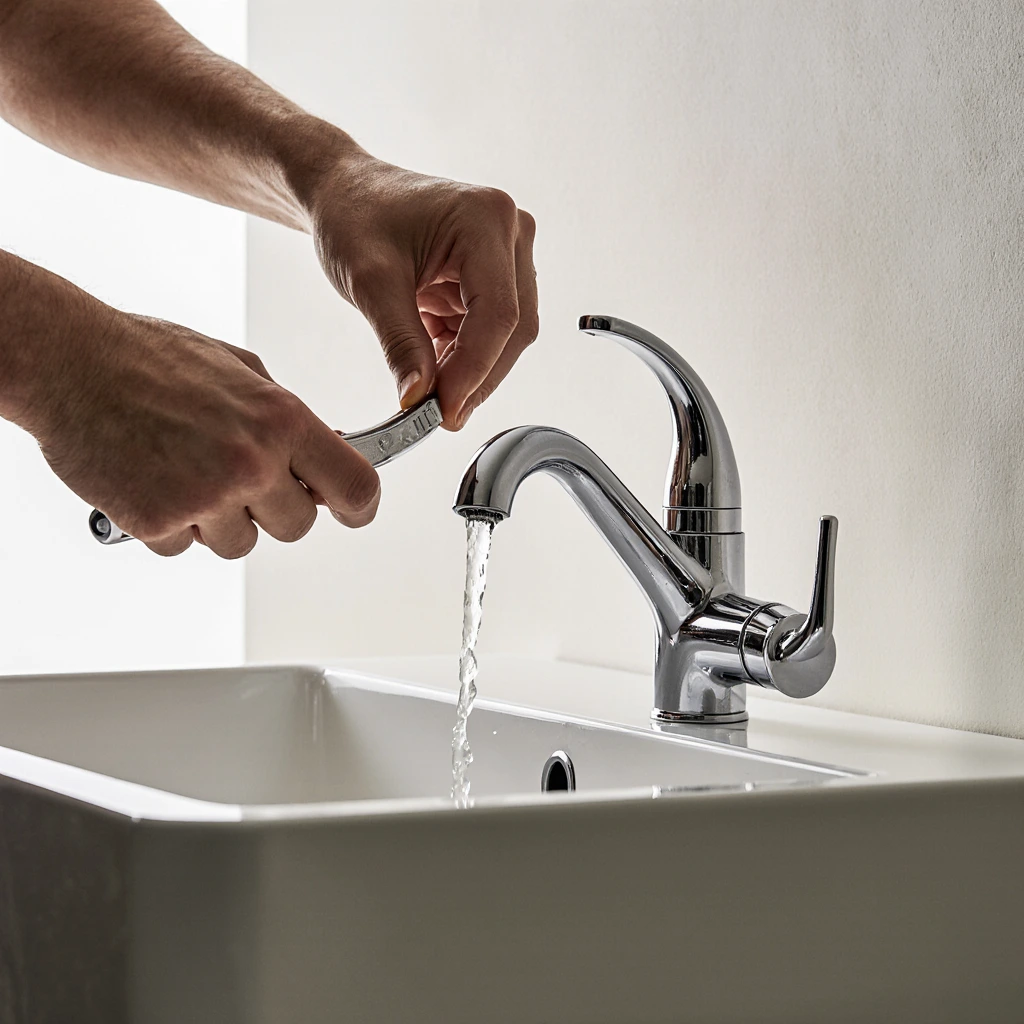
Step 1: Turn off the water supply
Before you touch anything, find the shut-off valves under your sink and turn them clockwise until they stop. Then turn the faucet on to release any remaining water pressure. This step is important — skip it and you’ll have a much bigger problem on your hands.
Step 2: Remove the faucet handle
Look for a small decorative cap on top of the handle. Pop it off with a flathead screwdriver and you’ll find a screw underneath. Remove the screw and pull the handle straight up. It might take a little wiggle if it’s been there for years.
Step 3: Find the worn part
Once the handle is off, you’ll see a packing nut. Use your wrench to unscrew it counterclockwise, then pull out the stem. At the bottom of the stem, there’s a rubber washer held by a brass screw. If it looks flat, cracked, or shiny, that’s your problem.
Step 4: Replace the washer
Take the old washer to the hardware store to match the size, or buy an assorted pack for a few dollars. Press the new washer firmly in place and secure it with the brass screw. While you’re at it, check the O-ring around the stem and replace it too if it feels stiff or looks cracked.
Step 5: Reassemble and test
Put everything back in reverse order: stem, packing nut, handle, screw, cap. Turn the water supply back on slowly and watch closely. The drip should be completely gone. If it still drips, the seat valve may be worn and might need professional help but this fixes about 90% of household faucet leaks.
Pro Tips
One thing people often miss: apply a thin layer of plumber’s grease to the new washer before installing it. This helps it seat properly and makes it last much longer.
Also, don’t overtighten the packing nut when putting it back. Finger tight plus a quarter turn with the wrench is enough. Over-tightening can damage the seat and cause a new leak.
Fixing a leaky faucet is one of those home repairs that sounds harder than it actually is. Once you’ve done it once, you’ll wonder why you ever thought about calling a plumber for it. Save that money, use it on something else, and enjoy the silence at night.