Laminate flooring is one of the most beginner-friendly flooring options available. It’s affordable, durable, looks great, and unlike hardwood or tile, it doesn’t require adhesive, grout, or special skills to install. The planks click together using a floating floor method, which means the whole floor essentially snaps together like a large puzzle.
I installed laminate floors in my living room and hallway over a long weekend. The finished result looks genuinely professional and I paid less than half what a flooring company quoted me. Here’s how it’s done.
What You’ll Need
- Laminate flooring planks (measure room in sq ft + 10% for waste)
- Underlayment (often included with laminate)
- Tape measure and pencil
- Circular saw or jigsaw
- Pull bar and tapping block (laminate installation kit, about $15)
- Spacers (quarter-inch) for expansion gap
- Rubber mallet
- Safety glasses
Step by Step Instructions :
Step 1: Prepare the subfloor
The subfloor must be clean, dry, and flat. Vacuum thoroughly and check for high spots (sand them down) or low spots (fill with floor leveling compound). Any unevenness greater than 3/16 of an inch over 10 feet will cause laminate to bounce or produce hollow sounds underfoot.
Step 2: Acclimate the flooring
Leave the unopened boxes of laminate in the room where they’ll be installed for 48 hours before starting. Wood-based materials expand and contract with temperature and humidity changes. Acclimating them to the room’s conditions prevents buckling or gaps from appearing after installation.
Step 3: Lay the underlayment
Roll out the underlayment foam across the entire floor, trimming it to fit. Tape the seams with the provided tape. Do not overlap sections overlapping creates high spots. The underlayment provides cushion, sound reduction, and a moisture barrier.
Step 4: Install the first row carefully
Start along the longest, straightest wall. Place quarter inch spacers against the wall (this expansion gap is essential without it, the floor will buckle as wood expands in warm weather). Lay the first row with the tongue side facing the room. The first row sets the alignment for everything that follows take time to get it perfectly straight.
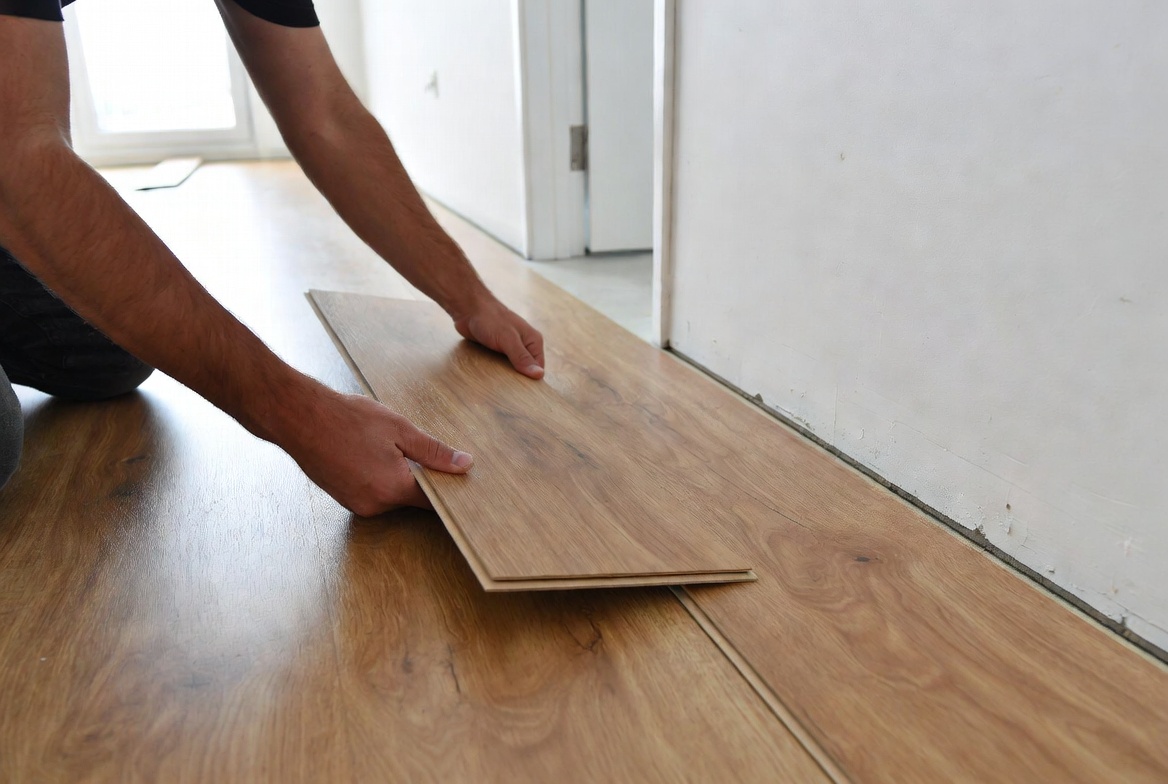
Step 5: Click and lock subsequent rows
Stagger the end joints of each row by at least 12 inches from the joints in the previous row (this is both structural and aesthetic). Connect each plank by angling the tongue into the groove of the previous row and pressing down to click it into place. Use the tapping block and rubber mallet to close any gaps. The last row will likely need to be cut lengthwise to fit.
Pro Tips
Cut laminate with the finished side facing up when using a hand saw, and finished side facing down when using a circular saw or jigsaw. This prevents the blade from chipping the visible surface.
Never glue laminate flooring unless the manufacturer specifically requires it. It’s a floating floor it needs to be able to move slightly with temperature changes, and gluing prevents that.
Final Thoughts
Laminate flooring installation is a realistic weekend project for most homeowners. The prep work is the most important part a well prepared subfloor makes the installation smooth and the result long-lasting. Take your time on the first row and the rest of the floor will follow naturally.