Recessed lighting transforms the feel of any room instantly. It creates a clean, modern look, eliminates the need for bulky ceiling fixtures, and can make a low ceilinged room feel significantly more open and spacious. The installation is more involved than changing a light switch, but it is absolutely within the reach of a careful DIY beginner.
This guide covers the most common scenario adding recessed lights to an existing room where you can access the ceiling from above through an attic. If you have no attic access, the process is slightly different but still very doable using remodel style cans.
What You’ll Need :
- Recessed light fixtures (remodel type if no attic access, new construction type if you have attic access)
- LED trim kits (sized to match your cans 4 inch or 6 inch are most common)
- Non contact voltage tester
- Drill and hole saw bit (4 inch or 6 inch, matching your fixture size)
- Fish tape or wire fish sticks
- Romex cable (14 gauge for 15 amp circuits, 12 gauge for 20 amp circuits)
- Wire nuts and electrical tape
- Stud finder
- Drywall saw
Step by Step Instructions:
Step 1: Plan your layout carefully
Sketch your room layout and decide where each light will go. General rule: place recessed lights about 2 feet from the walls and space them 4 to 6 feet apart from each other. Avoid placing them directly over where furniture will sit light aimed straight down at a couch or table creates harsh shadows. Place them slightly in front of those areas instead.
Step 2: Locate joists and check for obstructions
Use a stud finder to locate ceiling joists in your layout area. Position your lights between joists, not on them. Before cutting, check for any pipes, HVAC ducts, or existing wiring above the ceiling by probing with a thin wire through a small test hole. Attic access makes this inspection much easier.
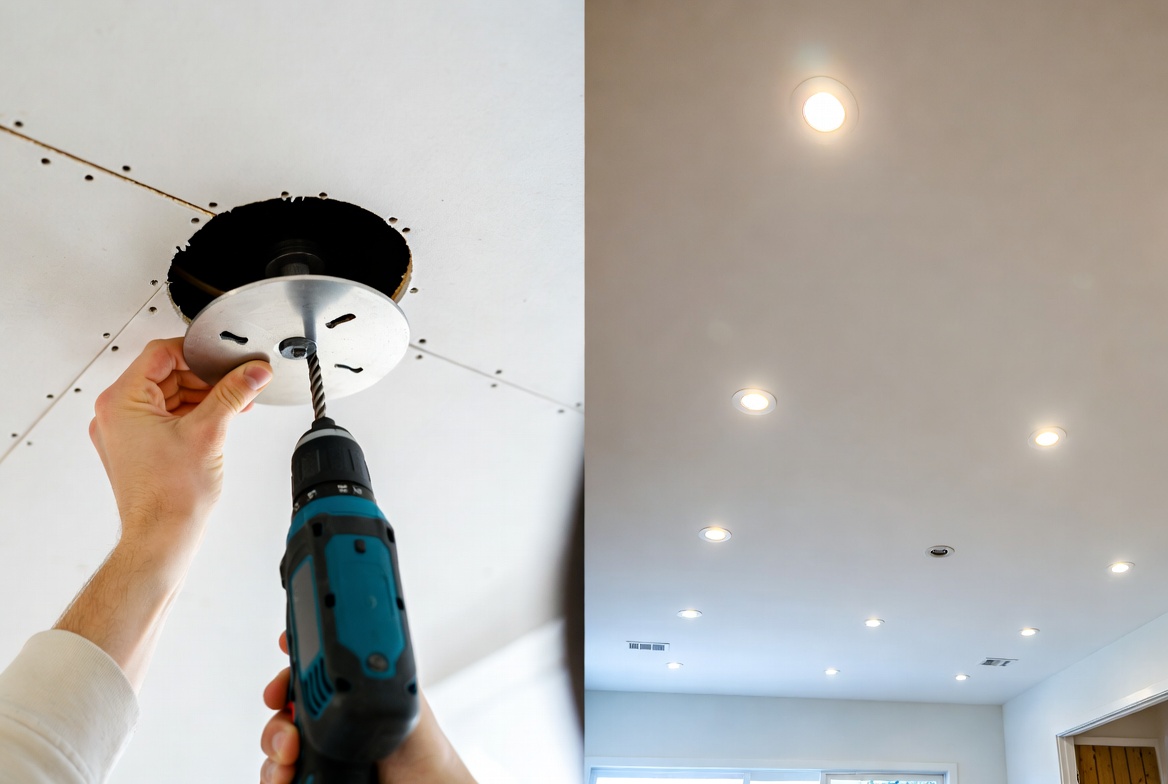
Step 3: Cut the holes
Mark each light location with a pencil, trace around the provided template or the fixture housing, and cut with a drywall saw or hole saw. Keep your cuts clean and as precise as possible ragged edges make the trim ring fit poorly. Vacuum out the drywall dust before proceeding.
Step 4: Run the electrical cable
Turn off power at the breaker for the circuit you are tapping into. Run new Romex cable from your power source (an existing junction box or the panel) to each fixture location. In attic spaces, cable can be run across the ceiling surface. Without attic access, use a fish tape to route cable inside the wall and ceiling cavity.
Step 5: Connect the fixtures
Each recessed fixture has its own junction box. Connect the incoming black wire to the fixture black, white to white, and bare copper to bare copper using wire nuts. If daisy-chaining multiple lights, use the fixture’s second set of wires to continue to the next can. Fold wires into the junction box and clip or push the fixture into the hole remodel fixtures have spring clips that expand behind the drywall to hold them in place.
Step 6: Install trim and test
Restore power at the breaker and test each light before installing the decorative trim rings. Once confirmed working, snap the trim ring into the can and install your chosen LED bulbs. Step back and assess the result recessed lighting almost always looks better than you imagined it would during planning.
Pro Tips
Use LED specific recessed fixtures or ensure your cans are rated for LED bulbs. Older incandescent-rated cans can overheat with certain LED bulbs.
Add dimmer switches when you install recessed lighting they are inexpensive and transform the versatility of the space. Make sure the dimmer is compatible with LED bulbs (not all are) and that your lights are dimmable LEDs.
Final Thoughts
Recessed lighting installation is one of the more ambitious DIY electrical projects but one with a dramatic payoff. The key is careful planning before cutting any holes and proper power verification before touching any wires. Once you have installed your first set, the process makes complete sense and subsequent installations go much faster.