The Right Way to Hang a Picture

Hanging pictures sounds like the easiest thing in the world. Then you end up with a hole in the wrong place, a frame that won’t hang level, or a nail that pulls straight out of the drywall three months later.

I’ve been there. My living room wall had four attempts before I got it right, and I could see every failed hole through the frame glass for years.

Here’s how to do it right the first time.

Step by Step:

Step 1: Decide exactly where it goes before touching the wall

Tape a piece of paper the same size as your frame to the wall with painter’s tape. Step back. Live with it for a day if you’re not sure. It’s completely free to move paper around. Holes in drywall are not free. Once you’re certain of the position, mark the top center of the paper with a pencil. That’s where your nail goes simple.

Step 2: Check what’s behind the wall

For anything over about 5 pounds, you should know what’s behind that spot. Use a stud finder to check for studs. If you hit a stud, great drive a nail or screw directly into it. It’ll hold easily. If there’s no stud, you have two options: use a proper drywall anchor rated for your frame’s weight, or move the frame slightly to hit a stud.

Step 3: Choose the right hardware for the weight

For small frames under 5 pounds a simple picture nail is fine. For 5 to 30 pounds with no stud use a toggle bolt or a snap toggle anchor. For anything over 30 pounds find a stud. Those decorative hooks that come in frame packaging? They hold maybe 5 pounds on a good day. Don’t trust them for anything real.

Step 4: Mark and drive your nail or anchor precisely

Make one clear pencil mark where your hardware goes. For a nail, drive it at a slight downward angle about 45 degrees so it hooks into the drywall rather than just puncturing it. For a toggle bolt, drill the specified hole size, insert the toggle, and tighten the bolt. Don’t rush this part.

Step 5: Hang the frame and level it

Hang the frame and use a small level on the top edge to check it’s straight. If it’s slightly off, most frames can be nudged left or right with gentle hand pressure. If it keeps tilting, put a small piece of painter’s tape on the bottom back corners of the frame it creates friction against the wall and holds the angle perfectly.

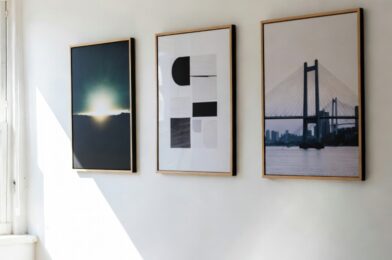
For gallery walls with multiple frames, cut paper templates of each frame and arrange them on the wall with painter’s tape before committing a single nail. Arrange, rearrange, step back, adjust. When you’re happy, mark through the paper for the nail positions, then remove the paper.

If you make a mistake hole, fill it with spackle on your finger, smooth it flat, let it dry 30 minutes, sand lightly with fine sandpaper, and touch up with paint. A good repair is invisible.

Wrapping Up

Hanging pictures well is mostly about patience at the planning stage. The actual hanging takes about 3 minutes. It’s the deciding and measuring before that determines whether it looks good. Take your time on that part and you’ll never end up with a wall full of regret holes again.

My Toilet Keeps Running: Here’s the $4 Fix That Actually Works

So your toilet won’t stop running. That sound like water quietly trickling 24 hours a day is one of those things that starts small and somehow gets more annoying every single day.

Here’s the thing most people don’t know: a running toilet wastes up to 200 gallons of water a day. That’s real money disappearing every month. And in most cases, the fix costs $4 and takes about 20 minutes.

I fixed mine last winter. Bought a replacement flapper at the hardware store, swapped it out before lunch, and the sound was gone. Here’s exactly what I did.

Step by Step:

Step 1: Open the tank and listen

Take the lid off the back of the toilet the tank, not the bowl. Set it somewhere safe. Now watch what’s happening inside. Is water trickling over the top of the tall tube in the middle? That’s the overflow tube, and it means your water level is too high. Is the water level fine but you can hear trickling into the bowl? That’s a leaky flapper. Most running toilets are a flapper problem.

Step 2: Do the food coloring test

Not sure which problem you have? Drop 5 or 6 drops of food coloring into the tank. Don’t flush. Wait 15 minutes. If color shows up in the bowl without flushing, your flapper has a slow leak. This catches silent leaks that waste water without making obvious noise. A lot of people have this and have no idea.

Step 3: Turn off the water and drain the tank

The shut-off valve is on the wall behind the toilet near the floor. Turn it clockwise until it stops. Then flush the toilet. Most of the water will drain out. Sponge up whatever’s left you want the tank as dry as possible before working in it.

Step 4: Replace the flapper

The flapper is the rubber seal at the bottom of the tank. It’s usually connected by two little loops to pegs on either side of the drain, and attached to the flush handle by a chain. Unhook the loops, unhook the chain, and take the old flapper to the hardware store to match the size. Snap the new one on, reconnect the chain with about half an inch of slack, and you’re done with the hard part.

Step 5: Adjust the float if the water level is too high

If water was going over the overflow tube, the float needs to come down. On modern toilets there’s a small adjustment screw or clip on the fill valve. Turn it to lower the float until the water stops about an inch below the top of the overflow tube. On older ball float toilets, you can gently bend the arm downward.

Step 6: Turn the water back on and test

Slowly open the shut off valve. Let the tank fill. The filling should stop on its own. Flush once and watch the tank should refill and then go quiet. If it’s still running, double check that the flapper is sitting flat on the seat and the chain isn’t caught underneath it.

Quick Tips

When you buy a new flapper, get a universal one unless your toilet is a specific brand that uses proprietary parts. Korky and Fluidmaster both make reliable universal flappers for about $3 to $5.

If you’ve replaced the flapper and the toilet still runs, the flush valve seat (the ring the flapper sits on) might be worn or warped. Run your finger around it if you feel roughness or a groove, the seat needs to be replaced or the whole flush valve assembly needs to go.

A running toilet is one of those repairs that seems like it should require a plumber. It almost never does. A $4 flapper and 20 minutes of your time is genuinely all it takes in 90% of cases. Fix it this weekend.

How to build a garage workbench

A solid workbench is the single most useful addition to any garage or workshop. Having a dedicated surface that can take abuse, support heavy work, and hold your tools within reach transforms how enjoyable and productive home improvement projects are. Without a workbench, you end up working on the floor, using a folding table that wobbles, or perching things on sawhorses.

This guide builds a simple, strong workbench using dimensional lumber from any hardware store. Total material cost is around $100 to $150 depending on your location. No advanced woodworking skills are needed if you can cut straight lines and drive screws, you can build this bench.

What You’ll Need

  • 2×4 lumber (for the frame)
  • 3/4-inch plywood (for the work surface one full 4×8 sheet)
  • 3-inch wood screws (structural) and 1.5 inch screws (for surface)
  • Drill and bits
  • Circular saw or jigsaw
  • Tape measure, square, and pencil
  • Level
  • Sandpaper (for the work surface edges)
  • Wood glue (optional but improves joint strength)

Step by Step Instructions:

Step 1: Decide on dimensions

A standard workbench is 34 to 36 inches tall (comfortable working height for most adults), 24 inches deep, and as wide as your space allows — typically 4 to 8 feet. If you are building along a wall, 8 feet is ideal as it matches the length of a standard plywood sheet with no cutting needed for the top.

Step 2: Cut your lumber to length

For a basic 6-foot by 2-foot bench at 34 inches tall, you will need four legs at 34 inches, two long horizontal rails at 72 inches (or your chosen length), and four shorter cross pieces at 21 inches (for 24-inch depth accounting for the 2×4 thickness). Measure twice and cut once small errors in the legs will make the bench rock.

Step 3: Build two end frames

For each end of the bench, connect two legs with a cross piece at the top and another cross piece near the bottom (about 4 inches from the floor) using 3 inch screws and wood glue. Check each frame is square by measuring diagonally from corner to corner both measurements should be equal. Let the glue begin to tack before continuing.

Step 4: Connect the two end frames

Stand the two end frames upright and connect them with the long rails on the front and back, one at the top and one near the floor. Pre-drill holes to prevent the wood from splitting. Drive 3 inch screws through the rails into the legs. Check that the assembled frame is level shim the feet if needed before the whole thing is assembled.

Step 5: Attach the work surface

Cut your plywood to size if needed and lay it on top of the frame. The plywood should overhang the front by 1 to 2 inches for clamping access. Drive 1.5 inch screws up through the top rails into the plywood from underneath this keeps the work surface clean without visible screw heads on top. Sand the edges and corners of the plywood smooth to prevent splinters.

Pro Tips

Add a lower shelf using a second piece of plywood resting on the bottom rails. This doubles your storage and makes the bench significantly more rigid and stable two benefits from one simple addition.

If you plan to do metalwork or any heavy hammering on the bench, screw a second layer of 3/4-inch plywood on top for a total of 1.5-inch thickness. This creates an essentially indestructible work surface that will last decades.

Building your own workbench is one of the most rewarding DIY projects because everything after it becomes easier. You gain a dedicated workspace, tool storage, and a surface that can handle real work without wobbling. The whole project takes one Saturday and costs less than a fraction of what manufactured workbenches sell for. Build it once, use it forever.